Detecting eye disease using Artificial Intelligence
Diabetic retinopathy (DR) is the leading cause of blindness in the working-age population of the developed world. It is estimated to affect over 93 million people. Progression to vision impairment can be slowed or averted if DR is detected in time, however this can be difficult as the disease often shows few symptoms until it is too late to provide effective treatment.
What is Diabetic Retinopathy?
Diabetic Retinopathy is an eye disease associated with long-standing diabetes. This happens when high blood sugar levels cause damage to blood vessels in the retina. These blood vessels can swell and leak. Or they can close, stopping blood from passing through. Sometimes abnormal new blood vessels grow on the retina. All of these changes can steal your vision. You can follow this link to find more about it.
How can we help?
Currently, detecting Diabetic Retinopathy (DR) is a time-consuming and manual process that requires a trained clinician to examine and evaluate digital color fundus photographs of the retina. Expertise and equipment required to diagnose the disease often lacks in the areas where rate of diabetes in local populations is high and DR detection is most needed. As the number of individuals with diabetes continues to grow, the infrastructure needed to prevent blindness due to DR will become even more insufficient.
We need a comprehensive and automated method for DR screening. With color fundus photography as input, we need to detect whether eye has DR or not automatically. If there is DR, we can go even further and rate how severe the disease is in the eye.
In this blog post, I will write about how we participated in the Diabetic retinopathy detection challenge on Kaggle using Intelec AI and built an automated DR detector. Let’s get started.
Data
We were provided with a large set of high-resolution retina images taken under a variety of imaging conditions. A clinician had rated the presence of diabetic retinopathy in each image between 0 and 4, according to the following scale:
0 - No DR
1 - Mild
2 - Moderate
3 - Severe
4 - Proliferative DR
Our task was to create an automated DR detector capable of assigning a score to a given image based on this scale.
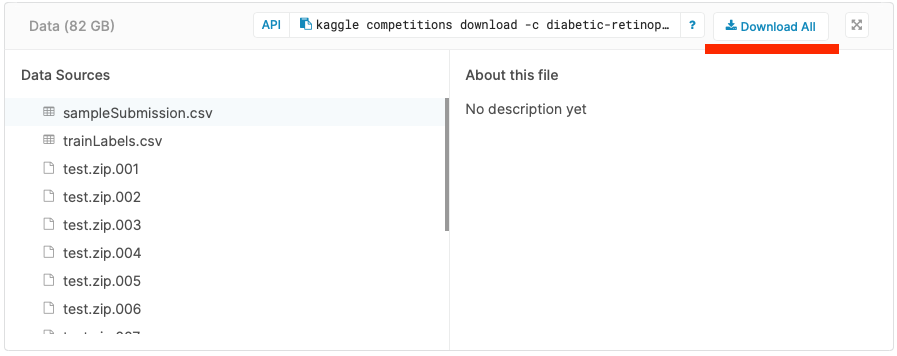
So we donwloaded the dataset from the Data page of the competition and extracted it:
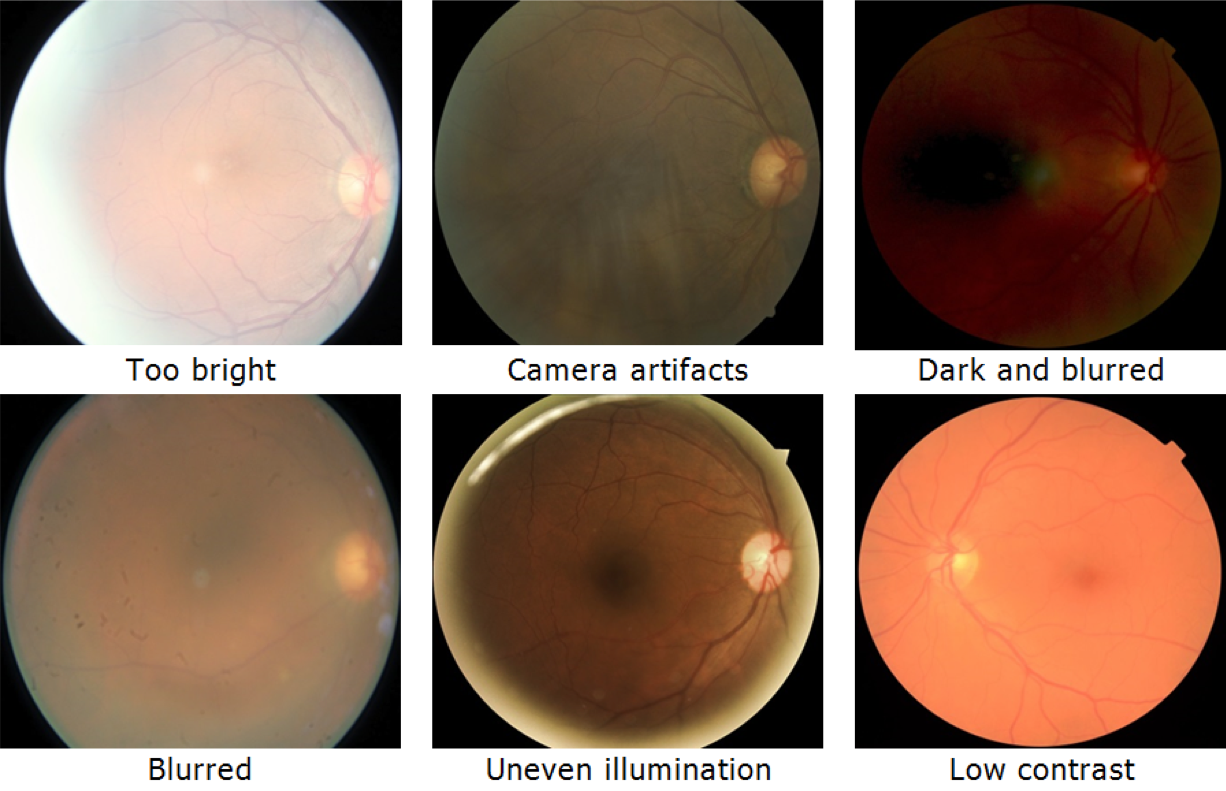
The images in this dataset came from different models and types of cameras and featured very mixed quality. There was noise in both the images and labels. Some images contained artifacts - were out of focus, underexposed, or overexposed. A major aim of this competition was to develop robust algorithms that can function in the presence of noise and variation.
Install machine learning tools
We used Intelec AI to train diabetic retinopathy detectors. You can download and install it for free from here.
Training first model
We decided to start from “Simple image classifier” to train a small neural network to classifiy given images into 5 categories (0 - 4). Small neural networks train fast, which is helpful in getting the first benchmark accuracy in short time. But there was a problem, images were very big (minimum resolution 2500x1900), which, if used as given, might have slowed down our training significantly. We solved this problem by shrinking all images 20 times. Shrinking the training images can decrease accuracy of final model but it is usually a good idea to start working on small images, before using the original images to get best accuracy.
So we trained a small neural network on the training images, which were shrinked 20 times:
 The training took 50 minutes and had 75% accuracy in the end. A nice start!
Increasing accuracy with deep neural network
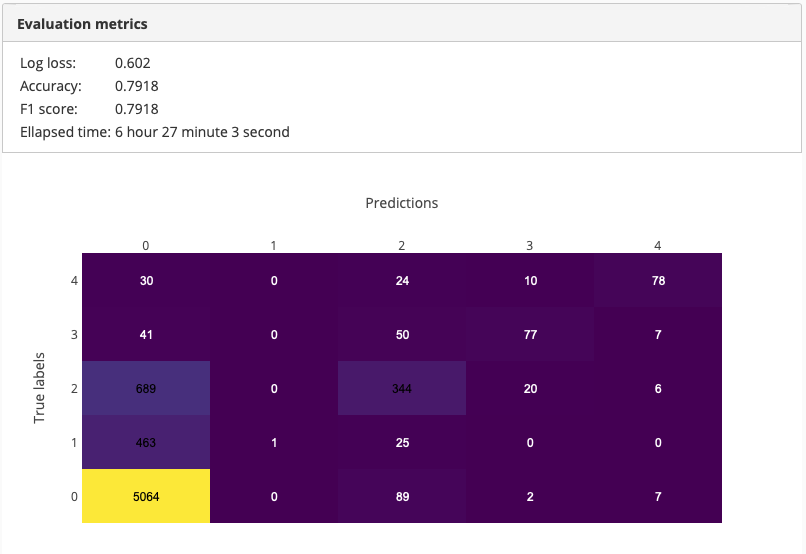
One way of increasing the detection accuracy is training a deeper network. It usually takes longer but produces a better accuracy. Hence we decided to train a deep neural network to see whether it would increase our detection accuracy.
 The training took ~6.5hours and achieved 79% accuracy. Training time was 6-7 times more than our previous training but it improved the accuracy by 5%.
Increasing input image size
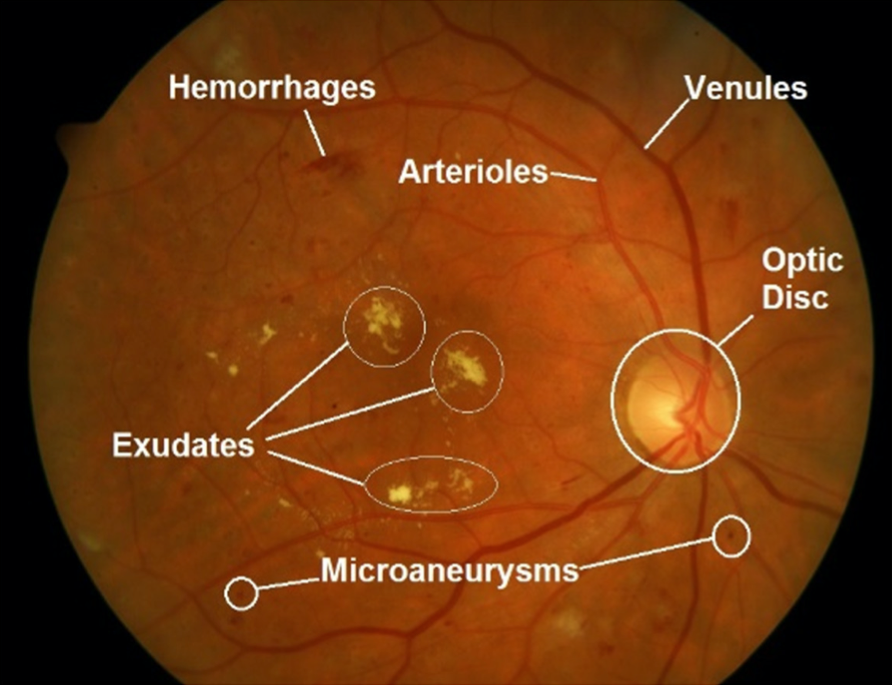
Our previous models were trained with images, which were 20 times smaller than the original ones. Small input size allowed us to train our first models in relatively short time. However, by shrinking our training images so much we loose a lot of small details, especially in our case, because important decision factors, like hemorrhages, microaneurysms and even exudates, are usually small spots in the picture (see the image above). By shrinking our images a lot, we get rid of them. This results in images with DR not having any DR related features and hence been classified as “No DR”.
Therefore we decided to decrease the shrink factor hoping to get some of the important small details back. This time we decided to shrink the images only 10 times.
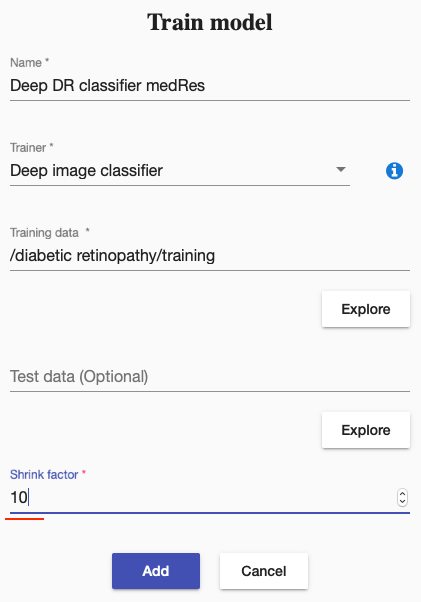 As you can already guess, it took significantly more time to train the model but it achieved higher accuracy.
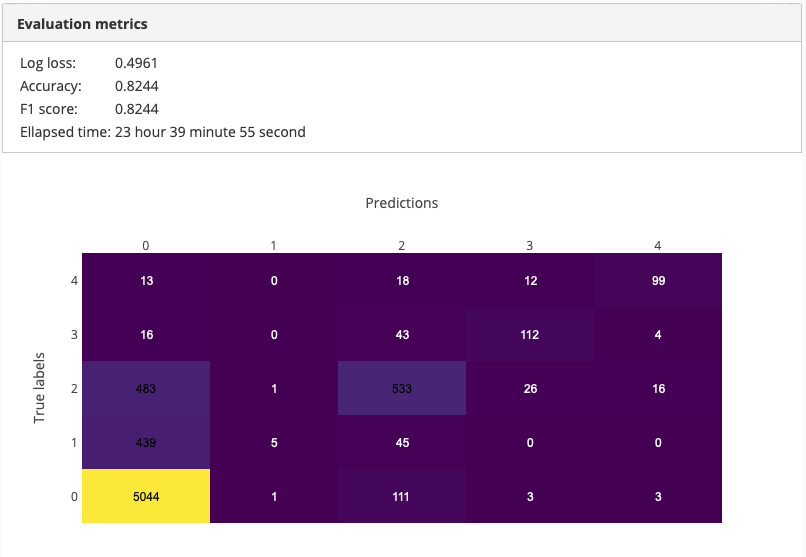 Accuracy of our final model was 82%. Perhaps it could be further increased by decreasing the shrink factor even more. But we decided to stop here in order to keep our demo short.
Test final model
Next, we deployed our model and ran it on some sample images. One of the results looked like the following:
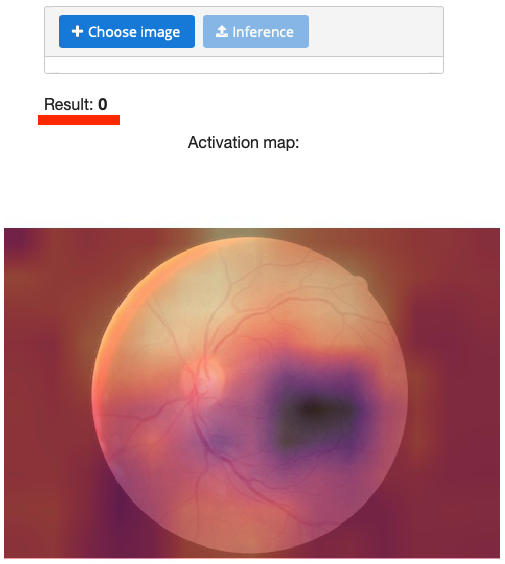 You can see here the result (prediction) and the activation map. Activation map shows where the model gave more attention while calculating the result. In the above picture, the bright spots got more attention than the dark ones.
Submit results to Kaggle
How good is our final accuracy 82%? To answer this question, we needed to run our final model on the test images, submit the results to Kaggle and see where we stand on the leaderboard of the competition.
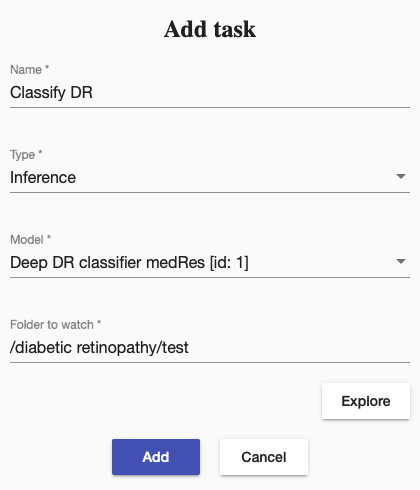
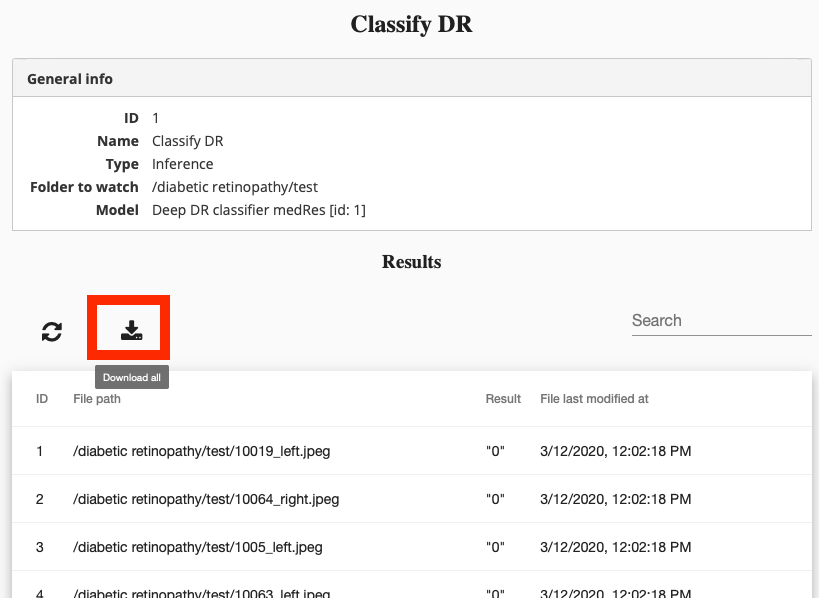
So we created a task to classify all our test images in “/diabetic retinopathy/test” using the final model “Deep DR classifier medRes”.
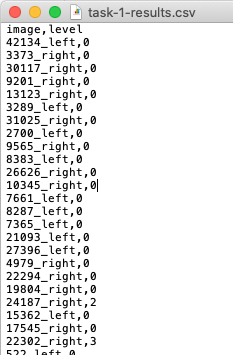
We then went ahead and downloaded the results,
converted them into the Kaggle submission format
and submitted to Kaggle.
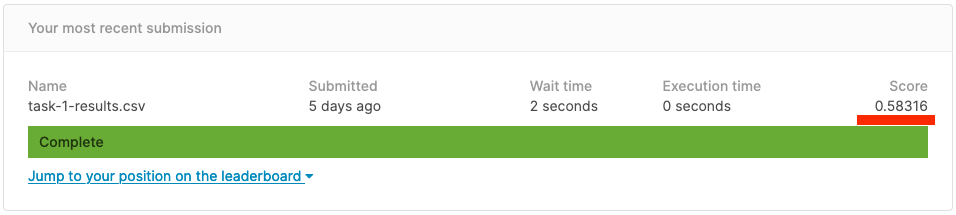
Our score was ~0.58. If we compare it with another results on the leaderboard, we were at 57-58th place, which falls into bronze place range.

Summary
Wow, that was a lot of work. We were able to train a diabetic retinopathy detector with 82% accuracy. The accuracy can be increased further
- by training a model on even bigger images
- by training a separate model, which recognizes different details of DR (hemorrhages, microaneurysms and exudates) and combining its results with the results of our original DR detector to make final decision
But we decided to stop here in order to keep our demo short. I hope you enjoyed it. I have also prepared a video demo of this work, where I show eveything, which we did in this blog post, step-by-step.