Image segmentation: change the color of your car! Step-by-step guide.
Have you ever wondered what your car would look like in another color? Or are you just interested in training a deep learning model for image segmentation tasks with no theoretical knowledge required? Or even both? Then this post is for you! There will be two main parts: first, how to create a dataset for an image segmentation task and then how to create and train a model. If you’re only interested in the second part, you can read it directly! I provided a dataset for it.
Gathering images and creating mask annotations
First things first, we need to gather car side view images. There are many ways to collect such data, I can suggest the following methods:
Unsplash
Unsplash is a great website that shares a lot of images freely available with nice permissive copyright terms. It was especially useful to me because I wanted to publicly share some of the pictures, in this blog, for example. The con here is that there are not many pictures specifically of car side views.
Google Images
Google Chrome and Firefox have a nice extension letting you download all images of your current active tab. Very useful if you google for example “car side -sidecar -sketch -cartoon” and go to the images tab. the “-” symbol means that you want to exclude those keywords from your search.
Out in the wild
If you have a good camera, you also can simply go around and take pictures yourself! Make sure to blur people and number plates if you want to make your dataset publicly available. I personally chose to adjust my dataset in this manner for copyright reasons.
You might need to collect around 200 images to get satisfying results.
Mask annotations
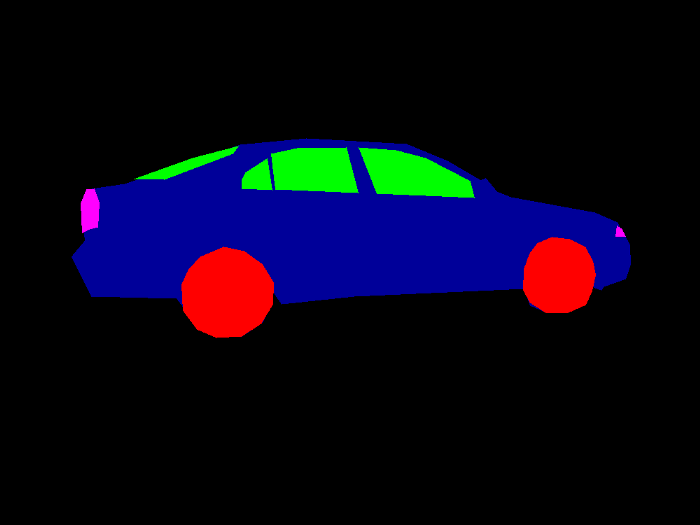
A mask annotation is an image with pixel values representing classes, as the image below shows. It can follow different formats: black-and-white PNG, colorful PNG, COCO style JSON, etc…
There are also many tools available for annotating images. I decided to use VoTT, which can be downloaded from their GitHub page here. It is really useful if you want to create bounding boxes or polygons for image segmentation. Polygons aren’t directly understood by all models for image segmentation, but there is software capable of translating polygons into actual masks for us. We will be using Intelec AI. Once you have downloaded VoTT, start it up. Set up a project, where “Target connection” is where you want to save your annotated images and “Source connection” is the location of your image dataset.
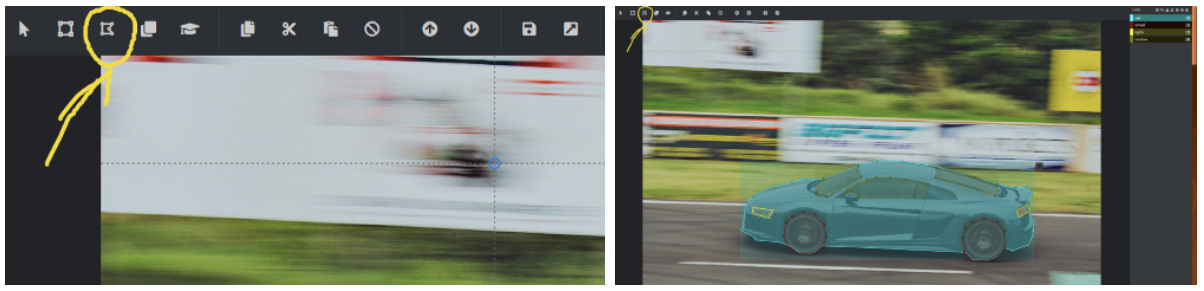
Click on the polygon option in the top left corner and start your annotation journey! Once you have finished drawing your polygon, press escape and choose your label. If you struggle with this software, I advise you to watch this quick tutorial.
When you are finished with annotating, there is one last and important thing to do! On the left panel, go to export settings and select VoTT format. Then on the top panel, click on export. It should yield a big JSON file, something like [project-name]-export.json. This file is very important: it contains all annotations in a format that Intelec AI can understands and translates for us.
As the screenshot above shows, I personally decided to segment the cars into 4 different categories: the car itself, to know where it is on the picture, the wheels, the front and back lights (labeled with lights) and finally the windows, rear windows and windshields (labeled with window).
If you want to try to train a model without annotating your own dataset, I provided mine here!
Train the model using Intelec AI
For this demo I chose to present you Intelec AI because it is easy to use and often yields good results. They propose different models for different tasks and do most of the data wrangling for us. You will actually not see a single line of code in this tutorial, thanks to VoTT and Intelec AI!
Intelec AI can be downloaded from this link. You will need to have Docker. Its installation is well explained in their page. I won’t explain how Docker works in detail here, but if you are a Linux user like me, I advise you to setup docker to be used without sudo, as this page suggest.
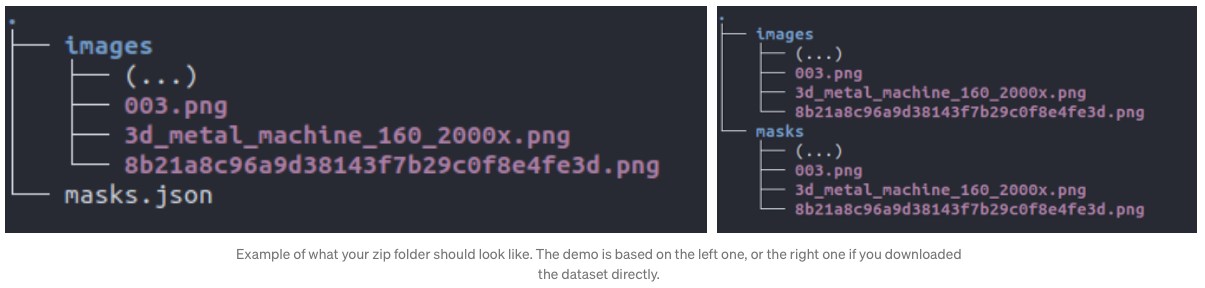
Once Docker and Intelec AI are installed, we can create a ZIP folder with the same structure as suggested by one of the screenshots below. You need to be careful about the structure: the name of the folder and the JSON file should match exactly as the screenshot below suggests.
If you annotated image yourself, be careful to rename your [project-name]-export.json into masks.json .
Then, go to the “File explorer” tab of Intelec AI and upload your zip folder. Unzip it by right-clicking on it. Now we can simply go to the training page and create an image segmentation trainer! Link it to the data we just uploaded, choose a shrink factor (I would advise a factor of 2 if you have a powerful GPU, otherwise go for a factor of 5) and press “train”. You can grab a coffee and come back in a few moments to see your results.
To me, it took less than 5 minutes to train 22 epochs with one GPU! Intelec AI offers a summary as shown below:
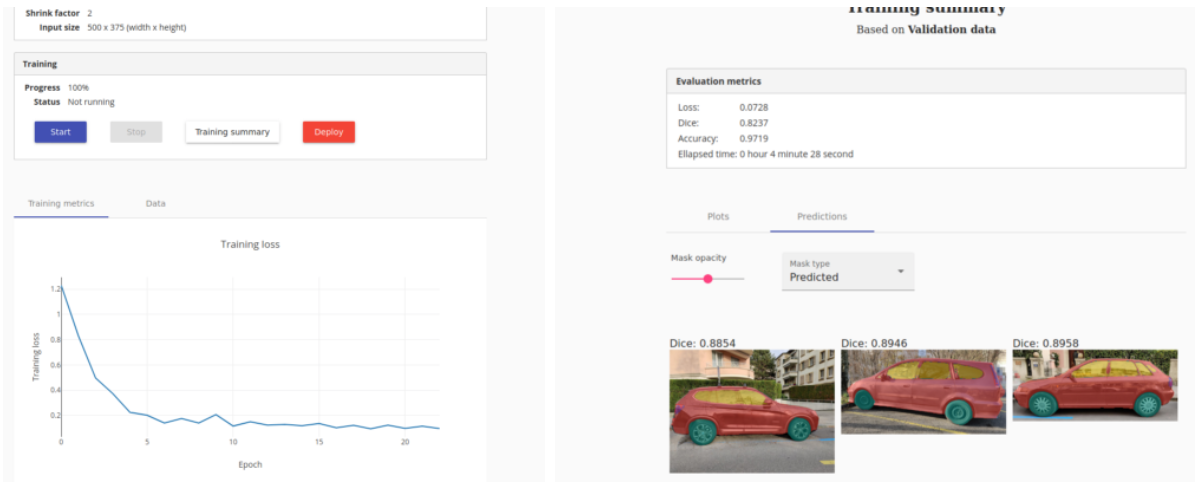
If you are curious to see how well the model is training through epochs, I saved some intermediate results as we can see below:
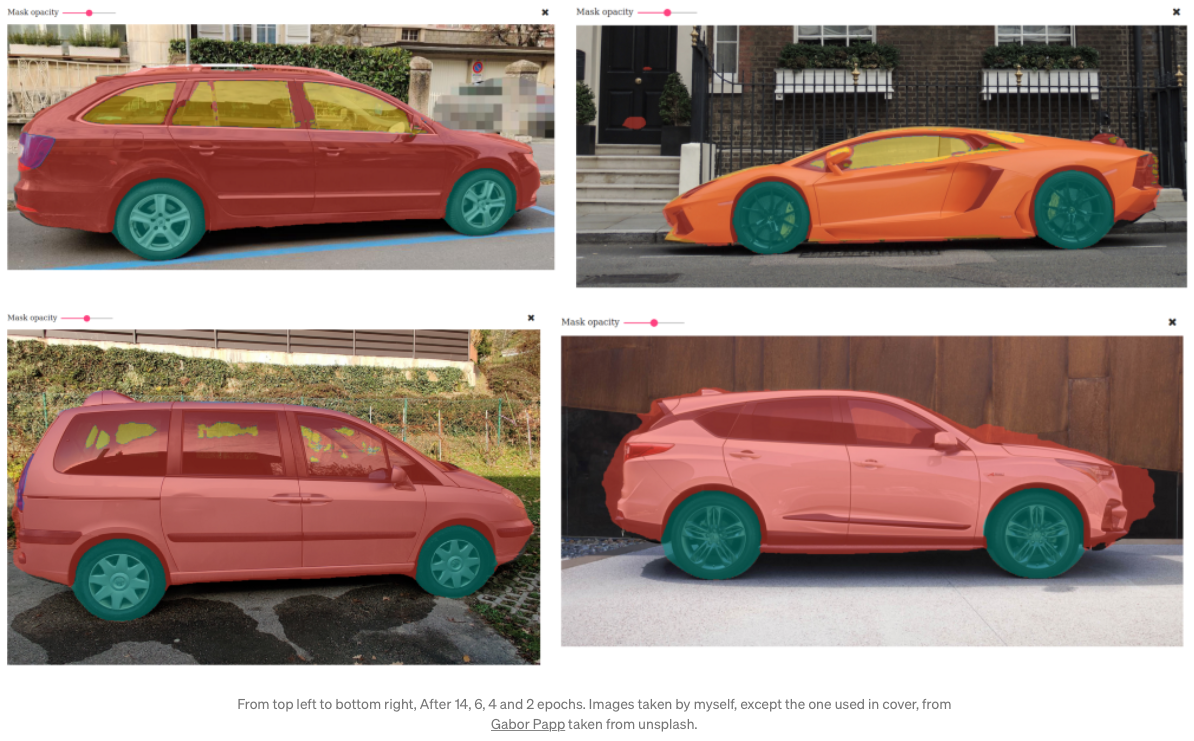
Bottom right shows that it already begins to understand the difference between the two main components of a car: the body and the wheels. Bottom left shows nice improvements when segmenting around the actual car. Top right shows that it begins to correctly guess where windows are as well. Top left shows how precise it became with windows and also started to detects back lights. It still has troubles with the front light though. If this is what you would actually be trying to detect, it might need more epochs as it is smaller than other objects. Intelec AI lets you train extra epochs easily: just press the “start” button again.
Making inference
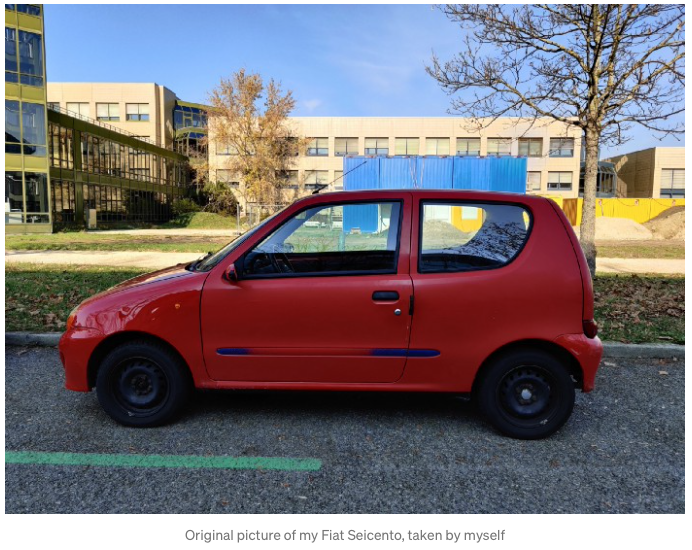
I was curious to see whether the model was overfitting, so decided to try out segmenting my own car! I deployed my model in the Intelec AI software, took a picture of my beautiful Fiat Seicento sport and uploaded it in the “Deployed models” tab. Here is the result!
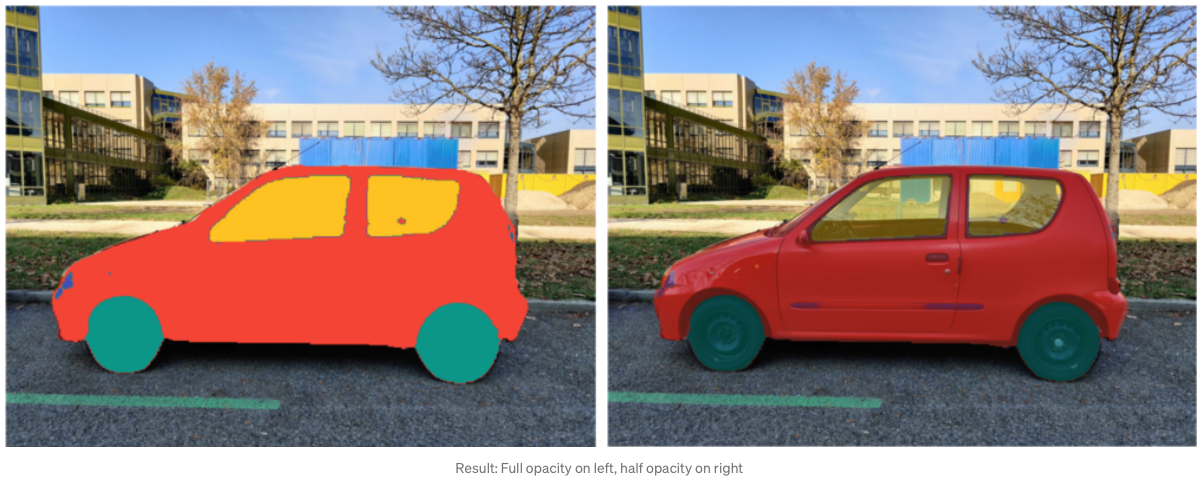
I have to be honest, I really didn’t think the model would be able to do such an awesome job! Now it is easy to use a sprite of a wheel you wanted to try out on your own car, because its location is automatically detected by the model with very good accuracy.
As you have now seen, nowadays it is not difficult anymore to do deep learning: you don’t need great skills of coding, nor the deep understanding of all the mathematics and subtleties of neural networks.